
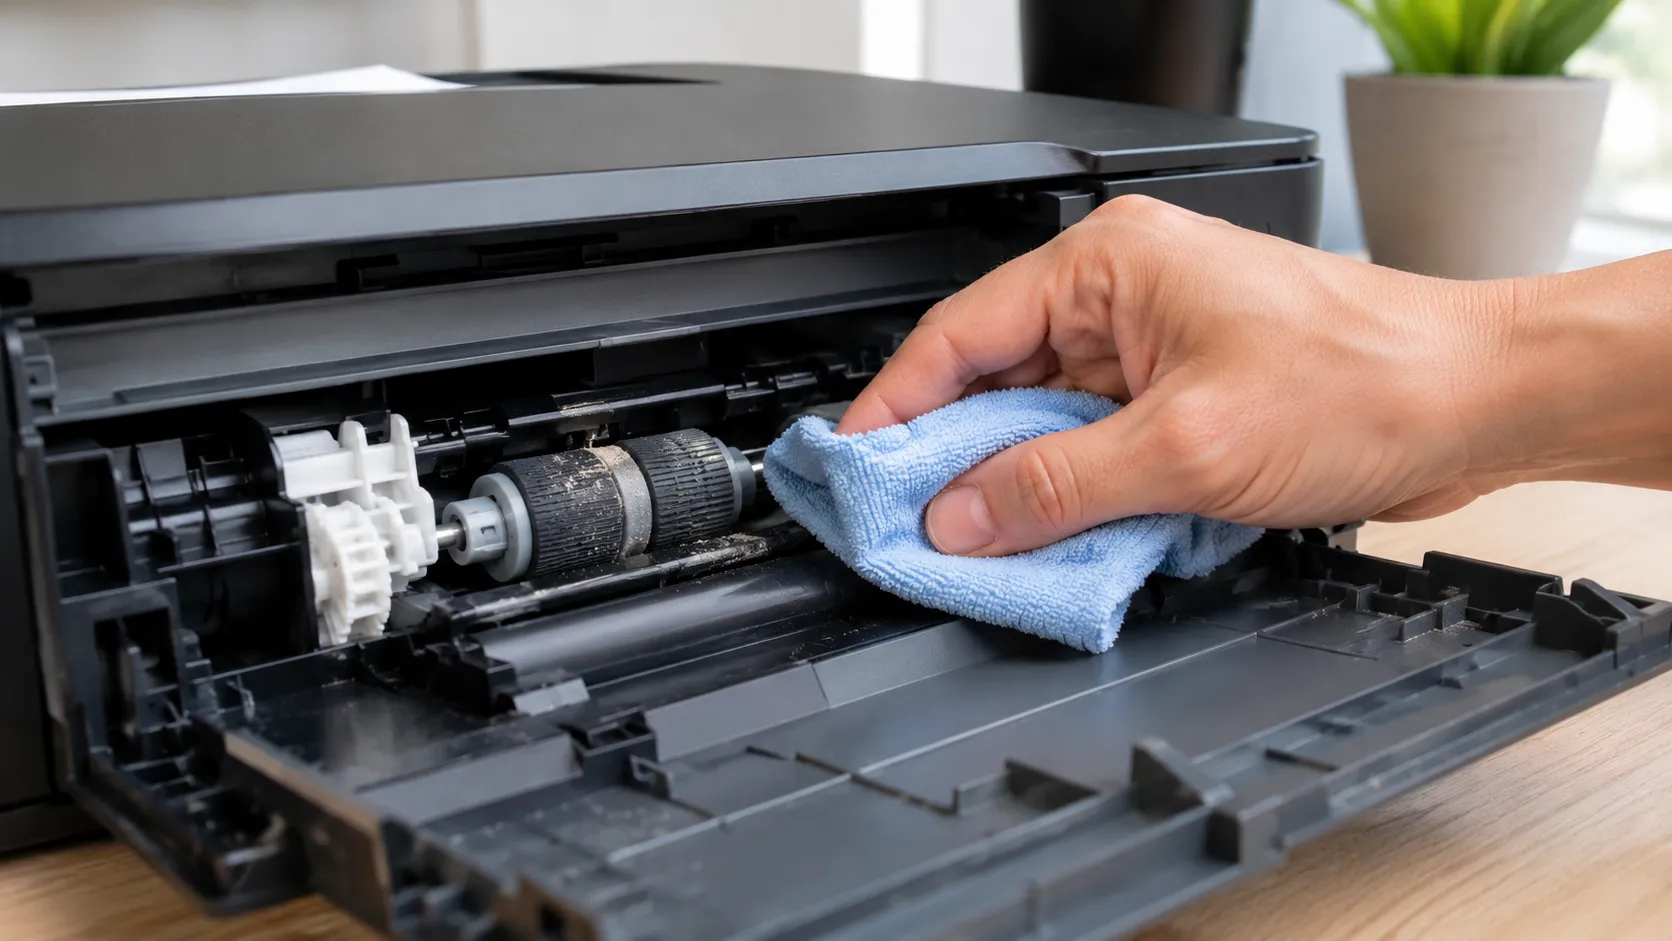
If your printer is pulling in two sheets at once, leaving faint dust-colored lines down the page, or refusing to grab paper at all, the rollers are usually the reason — not the ink, not the driver, and not the printer itself failing. Rollers are simple rubber parts, but they do all the physical work of moving paper through a printer, and after enough dust, paper residue, and general wear, they stop gripping the way they should.
The good news is that cleaning them is one of the cheapest, fastest fixes in printer maintenance — most of the time it takes under ten minutes and nothing more than a lint-free cloth. This guide covers what printer rollers actually are, how to clean every type safely, brand-specific notes for HP, Canon, Epson, and Brother, and how to tell when a roller needs replacing instead of cleaning.
What Are Printer Rollers and What Do They Do?
A printer roller is a rubber-coated wheel that grips and moves paper through the printer. Every printer — inkjet, laser, or multifunction — relies on a small set of these rollers working together to pull a single sheet from the tray, guide it past the print mechanism, and eject the finished page.
You'll typically find a few distinct types inside one printer:
- Pickup rollers — grab the top sheet from the paper tray and start feeding it in
- Feed rollers — carry the sheet through the internal paper path
- Separation rollers — hold back the rest of the stack so only one sheet feeds at a time
- Exit rollers — guide the finished page out into the output tray
Laser printers add a couple of roller types inkjets don't have — fuser rollers, which bond toner to the page using heat and pressure, and on some models transfer rollers, which move the toner image from the drum onto the paper. We'll cover both separately later, since they behave very differently from the rubber feed rollers above and need different care.
Most feed and pickup rollers are reachable without any tools — they sit just inside the paper tray opening or are visible when you open the main access cover. Fuser and transfer rollers sit deeper inside the printer and are generally not something you touch directly.
How to Clean Printer Rollers
Here's the short version: power off the printer, wipe the accessible rubber rollers with a lint-free cloth lightly dampened with water or isopropyl alcohol, rotate them by hand to reach the full surface, and let them dry fully before printing again. The full process:
- Turn off and unplug the printer. This isn't just a safety step — it also releases the tension holding the rollers in place, which makes them much easier to clean and rotate by hand.
- Open the paper tray and remove all paper. You want a clear, empty path to actually see and reach the rollers.
- Locate the accessible rollers. Look just inside the tray opening and along the main paper path behind the front cover — these are almost always the pickup and feed rollers, the ones that need cleaning most often.
- Prepare your cleaning material. A lint-free cloth (microfiber works well) lightly dampened — not soaked — with water or isopropyl alcohol. See the next section for exactly what to use and what to avoid.
- Wipe each roller with light, even pressure, working side to side across the rubber surface rather than pressing straight down.
- Rotate the roller by hand as you go, so you clean the entire circumference rather than just the section facing you. Most rollers turn freely when the printer is powered off.
- Let everything air-dry fully before closing the printer back up — even a little leftover moisture can cause paper to stick rather than feed.
- Reassemble and power the printer back on.
- Run a test print to confirm the fix worked. A free printer test page is the fastest way to check that paper is feeding cleanly again before you trust it with something real.
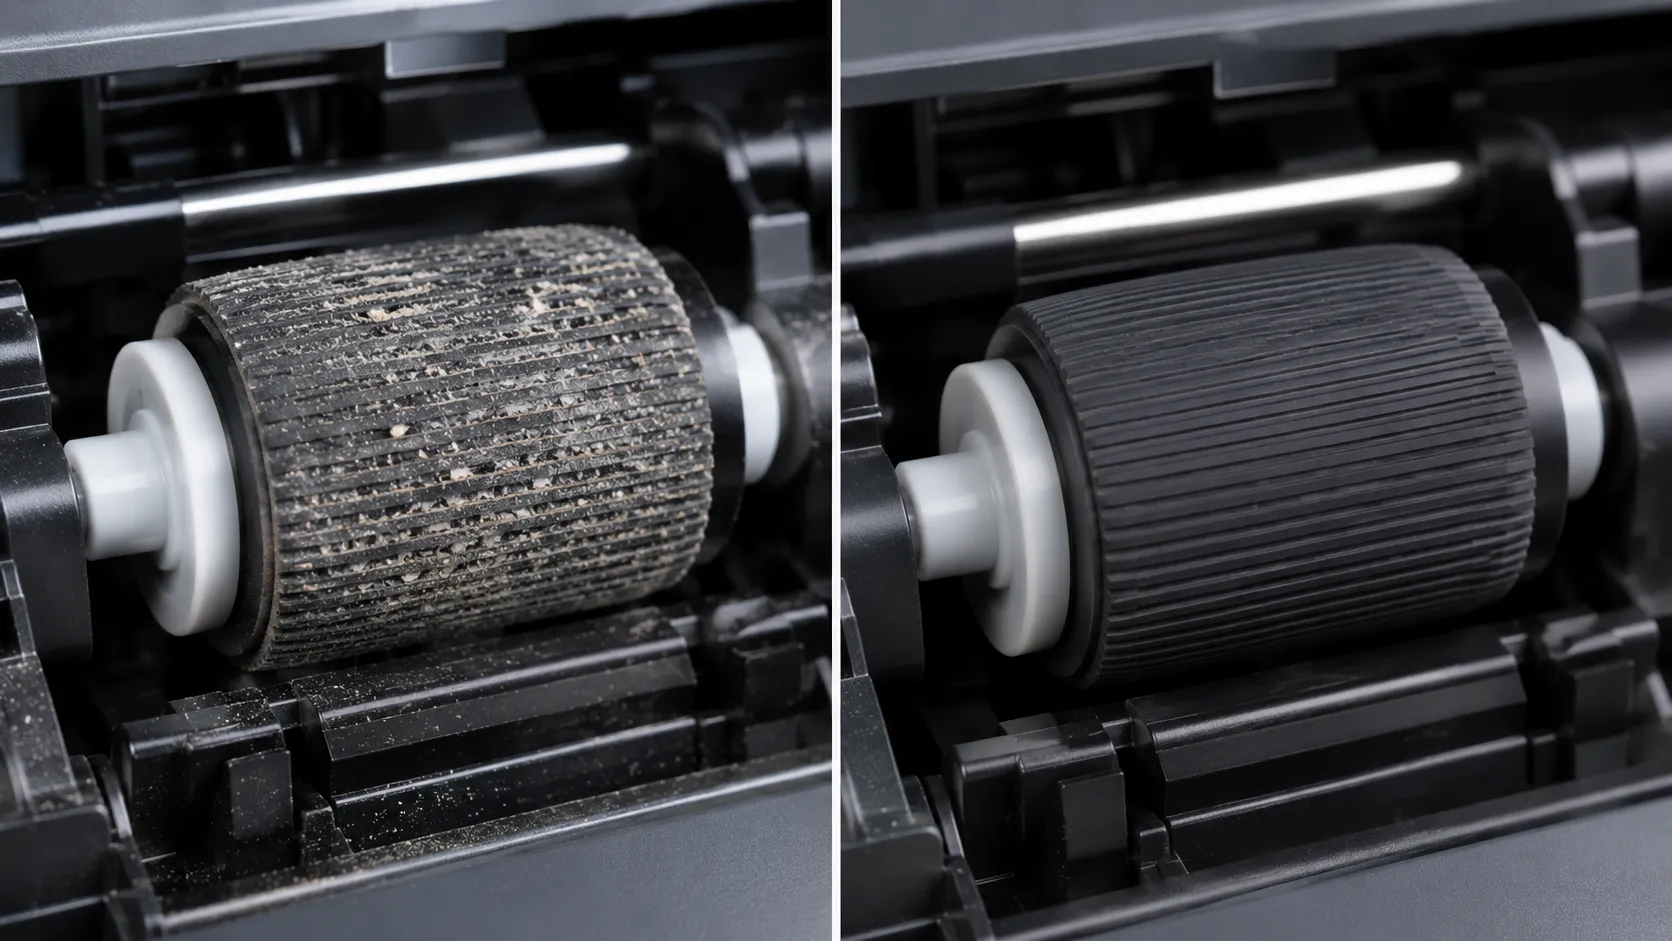
If a roller feels hardened, glassy, or shiny rather than slightly tacky under your finger, cleaning likely won't restore its grip — skip ahead to the replacement section.
What Can You Use to Clean Printer Rollers?
Use a lint-free cloth dampened with water for routine cleaning, or isopropyl alcohol (90%+) for built-up grime — never spray liquid directly into the printer, and skip household cleaners entirely.
A bit more detail on each option:
- Water is enough for light dust and is the safest default, especially for routine cleaning every few months.
- Isopropyl alcohol cuts through built-up paper residue and adhesive (common if you've ever run labels through the printer) more effectively than water alone. Stick to a lint-free cloth dampened with alcohol, never applied directly to the roller from a bottle or spray can.
- Compressed air is useful first, before wiping, to blow loose dust and paper fragments out of the tray and roller area.
- A soft, dry cloth works for a quick once-over between deeper cleanings.
What to avoid:
- Household glass or surface cleaners — many contain ammonia or other additives that degrade rubber over time
- Spraying any liquid directly into the printer — it's very easy for excess liquid to run into places it shouldn't
- Abrasive materials like paper towels or scouring pads, which can leave lint behind or wear down the rubber surface
- Soaking the cloth — damp, not wet, is the rule; rollers need to dry completely before you print again
How to Clean Paper Feed and Pickup Rollers
Feed and pickup rollers are the ones that fail most often, simply because they're the ones doing the most physical work every time you print. A few signs point specifically to these rollers rather than something else:
- The printer pulls in multiple sheets at once
- Paper feeds in crooked or skewed
- The printer tries to feed but the paper doesn't move
- You hear the motor engage with no paper movement at all
To clean them specifically, follow the same core process above, but pay particular attention to the roller closest to the tray opening (the pickup roller) — this is the one that directly contacts the top sheet and collects the most dust and paper fiber over time. On printers with a separation pad (a small rubber pad opposite the pickup roller, rather than a second roller), clean that pad the same way — it's just as often the actual cause of multi-sheet feeding as the roller itself.
How to Clean Printer Rollers on Different Brands
The core cleaning method is the same across brands — a damp lint-free cloth and manual rotation — but access points, built-in cleaning tools, and small quirks vary enough to be worth knowing before you start.
How to Clean HP Printer Rollers
Many HP inkjet models include a built-in roller-cleaning routine — check the printer's maintenance menu or HP Smart software for an option like "Clean Paper Feed Rollers" before doing it manually. If your model doesn't have one, HP's official guidance is the same manual process above: power off, open the tray, and wipe the visible rollers with a lint-free cloth. For a full HP-specific print quality and alignment check afterward, run the HP test print page.
How to Clean Canon Printer Rollers
Canon's PIXMA series generally requires manual cleaning — there's no automated roller-cleaning cycle on most consumer models, only nozzle and print head cleaning, which is a different component entirely. Access the rollers through the rear tray or front cassette depending on your model, and rotate gently; Canon's rollers on some models are more delicate and shouldn't be forced. Follow up with a Canon test print to confirm feeding is smooth again.
How to Clean Epson Printer Rollers
Epson's EcoTank and WorkForce lines are especially prone to feed issues after sitting idle for a while, since dust settles on the rollers between uses. Epson's own support documentation recommends the same damp-cloth approach, with extra attention to the rear paper feed on models that load from the back rather than a front tray. Check results with the Epson test print page.
How to Clean Brother Printer Rollers
Brother's laser models add a wrinkle: what looks like a feed problem is sometimes actually a worn or dirty drum unit rather than the rollers themselves, since Brother's drum and roller issues produce similar symptoms (streaking, uneven feeding). If cleaning the rollers doesn't resolve it, check the drum unit before assuming the rollers need replacing. Verify with a Brother test print.
Other Brands (Xerox, Lexmark, Kyocera, and More)
Across Xerox, Lexmark, Kyocera, Ricoh, and similar office-focused laser printers, the manual cleaning process is identical, but these models see far higher page volumes, so rollers wear out and collect residue faster — more frequent cleaning (monthly rather than every few months) is worth building into a routine on shared office printers. Each brand's own support site has model-specific access diagrams if your particular unit's roller placement isn't obvious.
Why Are Printer Rollers Not Grabbing Paper?
When a printer stops picking up paper at all, or grabs it inconsistently, the cause is almost always one of these:
- Dust and paper fiber buildup — the most common cause by far, and the easiest to fix
- Paper residue or coating transfer — glossy or coated paper can leave a film on the roller surface over time
- Worn, smooth, or hardened rubber — rollers lose their slight tackiness with age, and cleaning won't restore what's physically worn away
- Incorrect or incompatible paper — paper that's too heavy, too light, or curled can slip past rollers that would otherwise grip fine
- An overloaded tray — paper stacked above the tray's fill line puts uneven pressure on the pickup roller
Work through them in that order: clean first, check your paper, and only consider replacement once cleaning genuinely hasn't helped.
How to Fix Paper Jams Caused by Printer Rollers
Worn or dirty rollers are one of the most common root causes of repeated paper jams, since a roller that can't grip evenly often pulls a sheet in crooked, which is exactly what causes a jam. Clearing a jam safely (unplugging the printer first, pulling gently in the direction the paper was already moving, checking for torn scraps left behind) is its own detailed process — we cover every step of that safely in our dedicated guide, why your printer keeps jamming and how to clear it safely. If you're dealing with an active jam right now, that's the faster place to go; come back here once it's clear if you want to stop it from happening again.
Why Are My Printer Rollers Squeaking or Making Noise?
A squeak or grinding sound during feeding is usually one of these:
- Dust or dry buildup creating friction against the roller housing
- A worn roller that's lost its smooth, even rubber surface
- A foreign object — a small paper fragment or label backing stuck against the mechanism
- Mechanical wear in the gears or bearings driving the roller, rather than the roller itself
Start by cleaning the rollers and visually checking for anything obviously lodged nearby. If the noise continues after a clean roller is confirmed to be turning freely by hand, the cause is more likely mechanical than something you can fix with cleaning — that points toward replacement or service rather than more cleaning.
Should You Lubricate Printer Rollers?
Printer rollers are designed to work dry, and adding lubricant is more likely to cause slipping than fix it. Rubber rollers grip paper through friction, and oils or lubricants reduce exactly that friction, which is the opposite of what you want.
The exception is specific mechanical parts a manufacturer explicitly documents as needing lubrication — certain gears or slides in some printer models, not the rubber roller surface itself. If a manufacturer's official service documentation calls for lubricant on a specific part, follow that guidance exactly; don't apply general-purpose lubricant to rollers on your own judgment.
Printer Roller Maintenance
A simple routine prevents most roller problems before they start:
- Clean accessible rollers every few months for home use, or monthly for a printer that sees heavy daily use
- Use paper within your printer's supported weight range — chronically feeding paper that's too heavy or too light accelerates wear
- Keep the printer in a reasonably clean, dust-controlled environment where possible
- Store paper properly so it isn't shedding excess fiber or absorbing humidity before it's even loaded
- Check rollers for visible wear (shiny, smooth, or hardened spots) whenever you're already cleaning, so you catch replacement-stage wear early instead of after it starts causing jams
Laser vs. Inkjet Printer Rollers
Inkjet and laser printers both use pickup and feed rollers the same basic way, but the printers around them work differently enough that it's worth knowing the distinction. Inkjet rollers only ever handle room-temperature paper and wet ink, so cleaning them is low-risk and something you can safely do anytime. Laser printers add heat-based components downstream of the feed rollers — the fuser, covered below — which changes what's safe to touch and when. If you own a laser printer, the rubber pickup and feed rollers near the tray are just as safe to clean yourself as on any inkjet; it's the components further into the paper path that need more caution.
Laser Printer Rollers, Fuser Rollers and Transfer Rollers
These three terms get used loosely, but they're genuinely different components with different care requirements:
| Component | What it does | Can you clean it yourself? |
|---|---|---|
| Pickup/feed rollers | Physically move paper through the printer | Yes — the standard cleaning process above |
| Fuser roller | Uses heat and pressure to bond toner permanently to the page | Generally no — internal, can be extremely hot, and typically a service/replacement item, not a cleaning one |
| Transfer roller/belt | Moves the toner image from the drum onto the paper | Rarely — usually a sealed, self-contained part replaced as a unit |
If you're troubleshooting a laser printer specifically, it's worth confirming which of these is actually involved before attempting anything. Faded or smudged output that wipes off the page points to the fuser, not the feed rollers — and fuser components can stay dangerously hot well after a print job finishes, so always let the printer sit and cool down before opening that area, and don't attempt to clean or touch the fuser unit yourself. Feed and pickup roller cleaning is safe to do yourself; fuser and transfer components are best left to a qualified technician or a manufacturer-authorized service center.
How to Clean ADF / Document Feeder Rollers
The Automatic Document Feeder (ADF) used for scanning or copying multi-page documents has its own small set of rollers, separate from the print-side pickup rollers, and just as prone to collecting dust since documents being scanned often carry more surface debris than fresh printer paper. If scanned copies come out with faint vertical lines, or the ADF misfeeds multi-page documents, clean these rollers the same way as the print-side ones — lint-free cloth, lightly damp, with the unit powered off. Most ADF covers lift or unlatch easily to expose the rollers directly.
When Should You Replace Printer Rollers?
Cleaning solves the majority of feed problems, but a roller can wear out physically, at which point no amount of cleaning restores it. Signs it's time to replace rather than clean again:
- Feed problems return within days of cleaning, rather than months
- The rubber surface looks or feels smooth, shiny, or hardened instead of slightly tacky
- Visible cracking or flat spots on the roller surface
- Jams keep recurring even with clean rollers and appropriate paper
- The printer is older and has printed a high page volume — rollers are a wear item, like tires, and eventually reach the end of their service life regardless of care
Replacement roller kits exist for most common printer models and are inexpensive compared to replacing the printer, but the exact procedure (which panels come off, whether it needs a specific tool) varies by model — check your printer manufacturer's official service documentation or support site for the exact steps for your model before attempting a replacement yourself.
Frequently Asked Questions
How do I clean printer rollers?
Power off and unplug the printer, then wipe the accessible pickup and feed rollers with a lint-free cloth lightly dampened with water or isopropyl alcohol, rotating each roller by hand to reach its full surface. Let everything dry completely before printing again.
What can I use to clean printer rollers?
A lint-free cloth dampened with water works for routine dust, while isopropyl alcohol handles more stubborn residue. Avoid household glass cleaners, abrasive materials, and spraying any liquid directly into the printer.
Why is my printer not picking up paper?
Usually dust or residue buildup on the pickup roller, worn or hardened rubber that's lost its grip, an overloaded tray, or paper that's incompatible with your printer's supported weight range.
Why are my printer rollers making noise?
Dust, a worn roller surface, a small object caught near the mechanism, or — if the noise continues after a clean, freely-turning roller — a mechanical issue in the gears or bearings rather than the roller itself.
How often should printer rollers be cleaned?
Every few months for typical home or small-office use, or monthly for printers handling heavy daily volume.
Can I use alcohol to clean printer rollers?
Yes — isopropyl alcohol (90%+) on a lint-free cloth is effective for built-up grime, as long as it's applied to the cloth rather than sprayed directly into the printer, and the rollers are allowed to dry fully afterward.
When should printer rollers be replaced?
When the rubber feels smooth, shiny, or hardened rather than slightly tacky, when feed problems return quickly after cleaning, or when jams keep recurring despite clean rollers and correct paper.
Can dirty rollers cause paper jams?
Yes — a roller that can't grip evenly often pulls paper in crooked, which is one of the most common causes of a jam. See our paper jam troubleshooting guide for how to clear one safely.